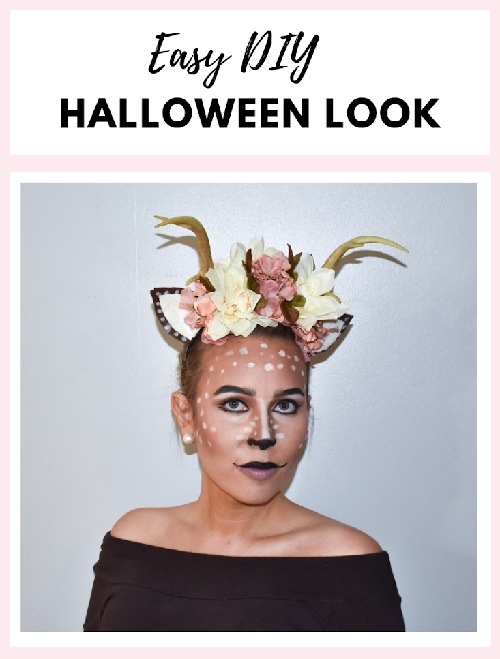
An Easy Halloween Look, Perfect With Or Without Hair
Looking for a fun and easy Halloween look? Check out my DIY Bambi Halloween tutorial. This is perfect when going through chemo or with your hair down. Keep reading for the supply list and steps for recreating this look.
I haven't been huge into Halloween for the past few years, but partnering with IHadCancer for a easy DIY Halloween tutorial has become my favorite part of the season. Check out last year's cat tutorial. This year, I decided to go with a cute Bambi look. Many of the makeup items and craft supplies I already had. Everything else came from Ulta and AC Moore and I was able to use coupons. Feel free to modify the supplies to fit what you already have. I hope you enjoy recreating this Bambi look.
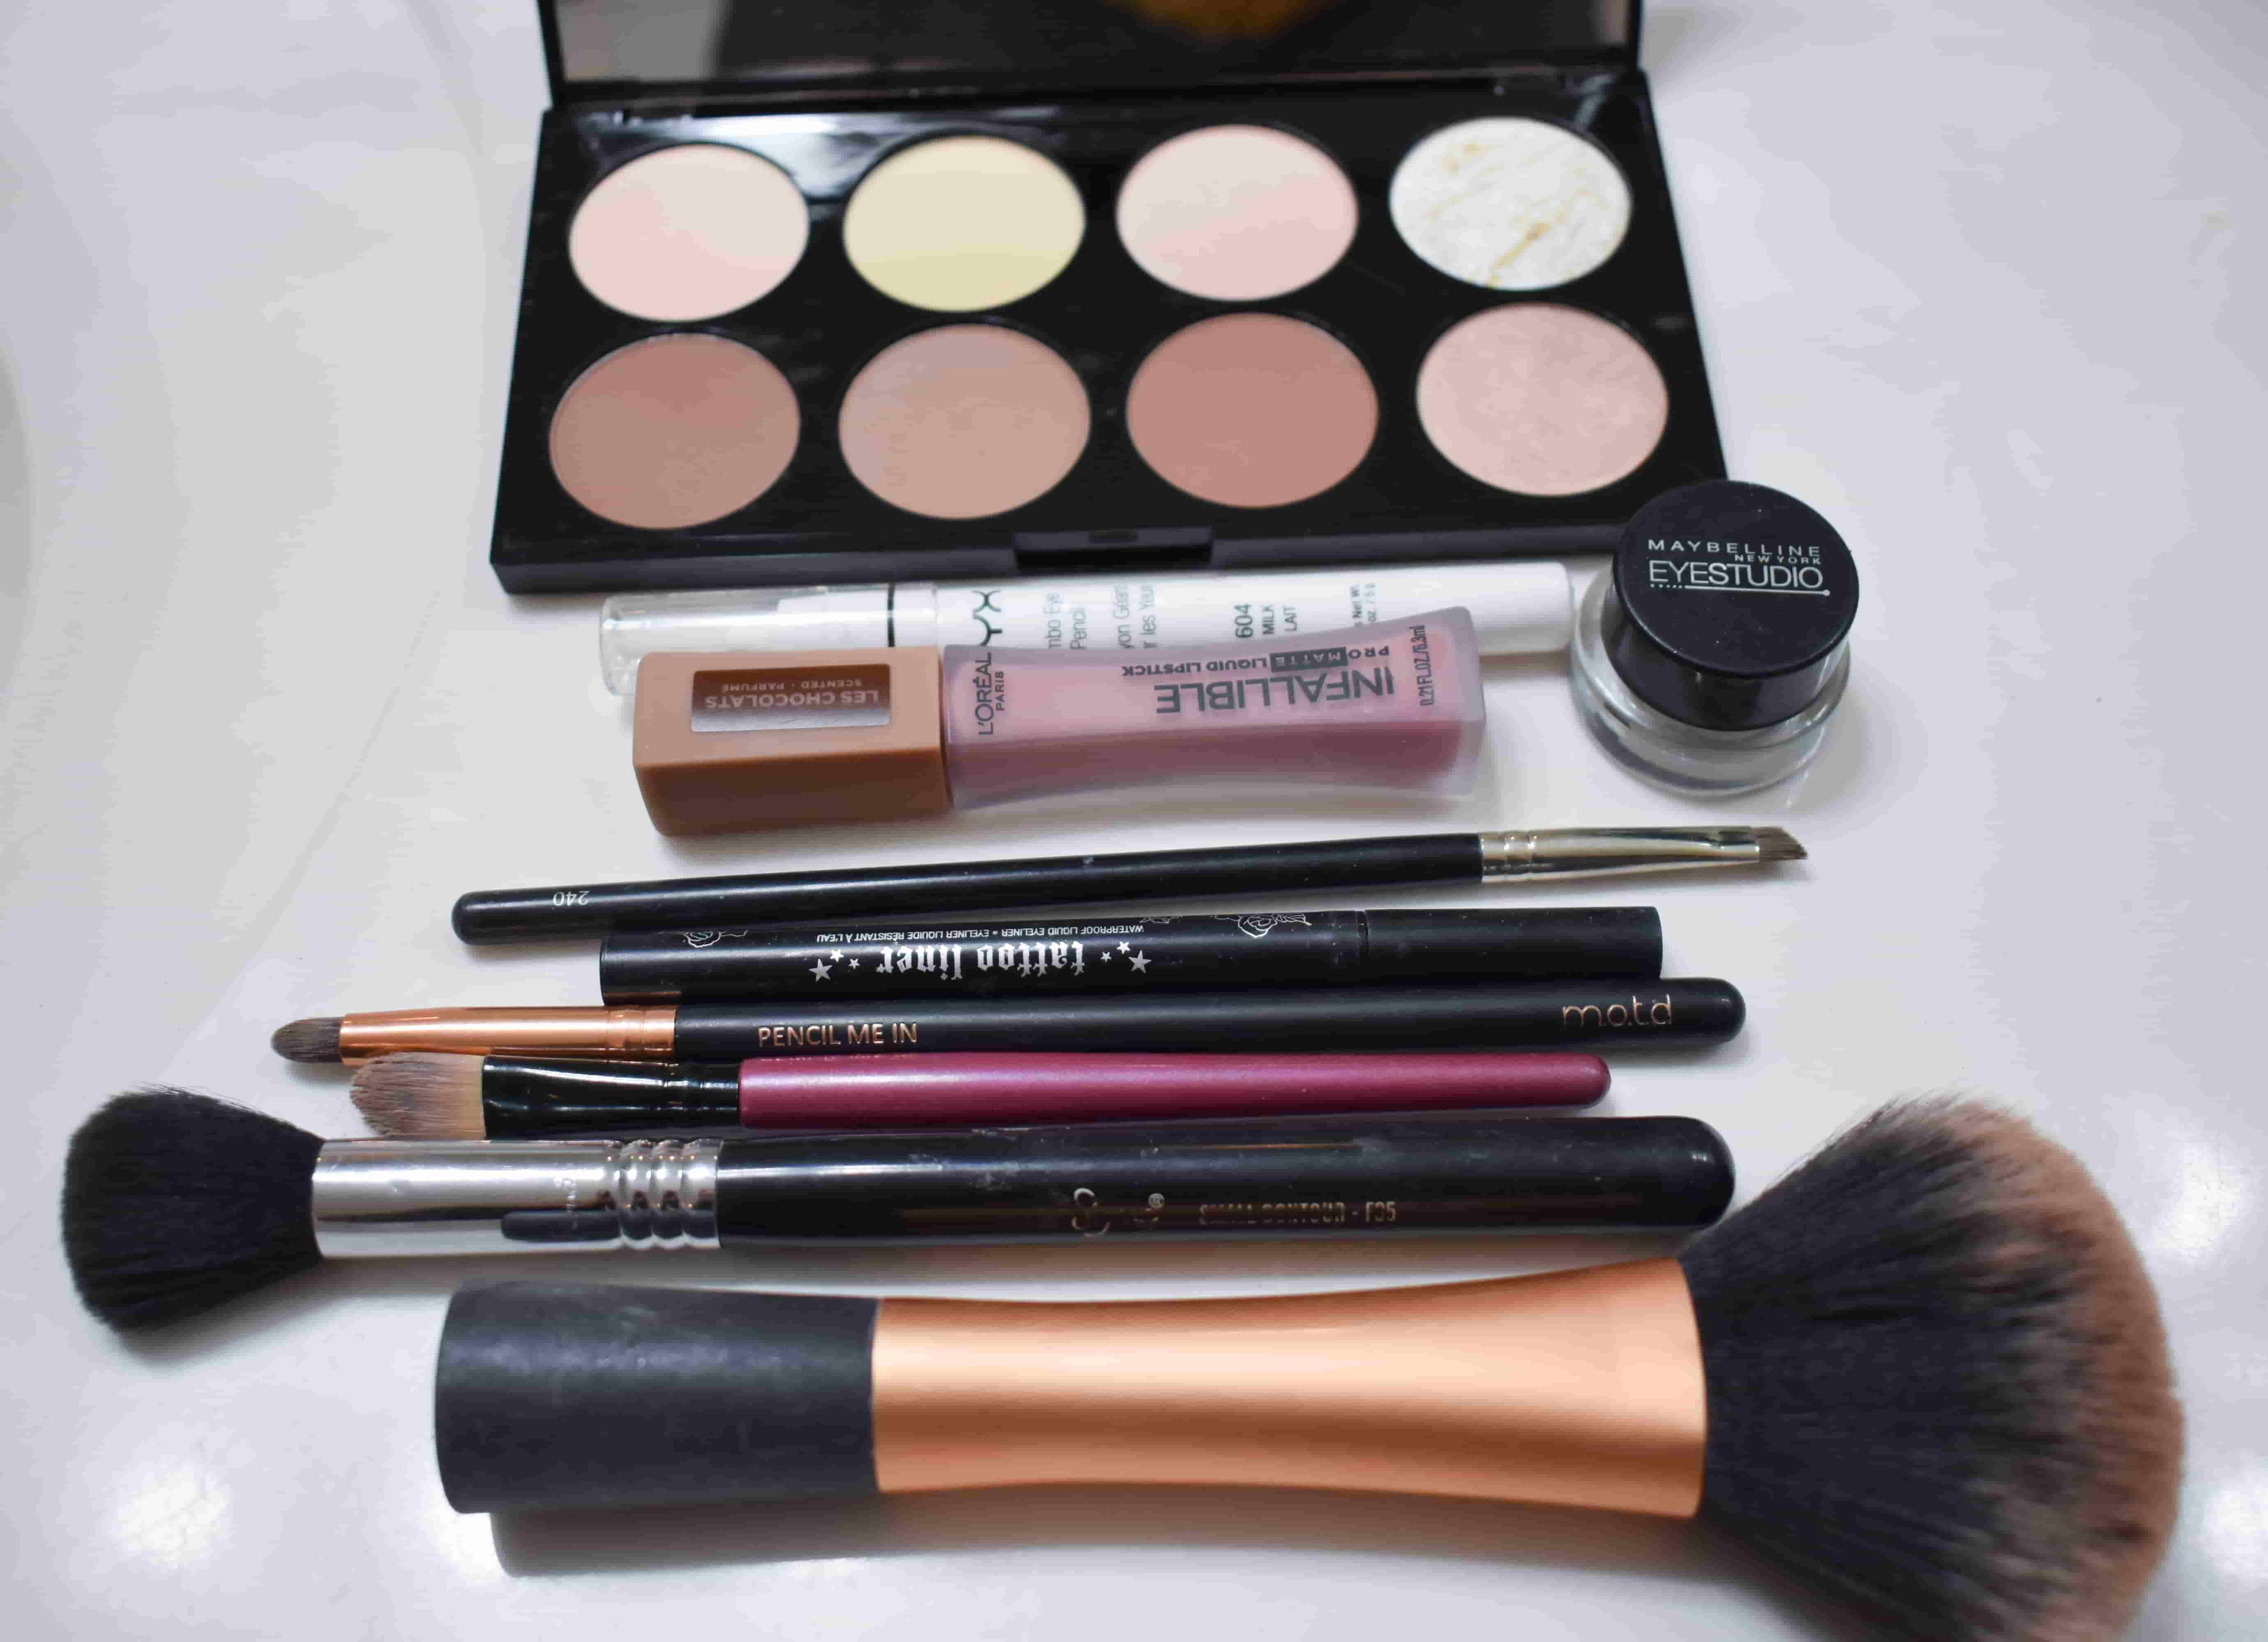
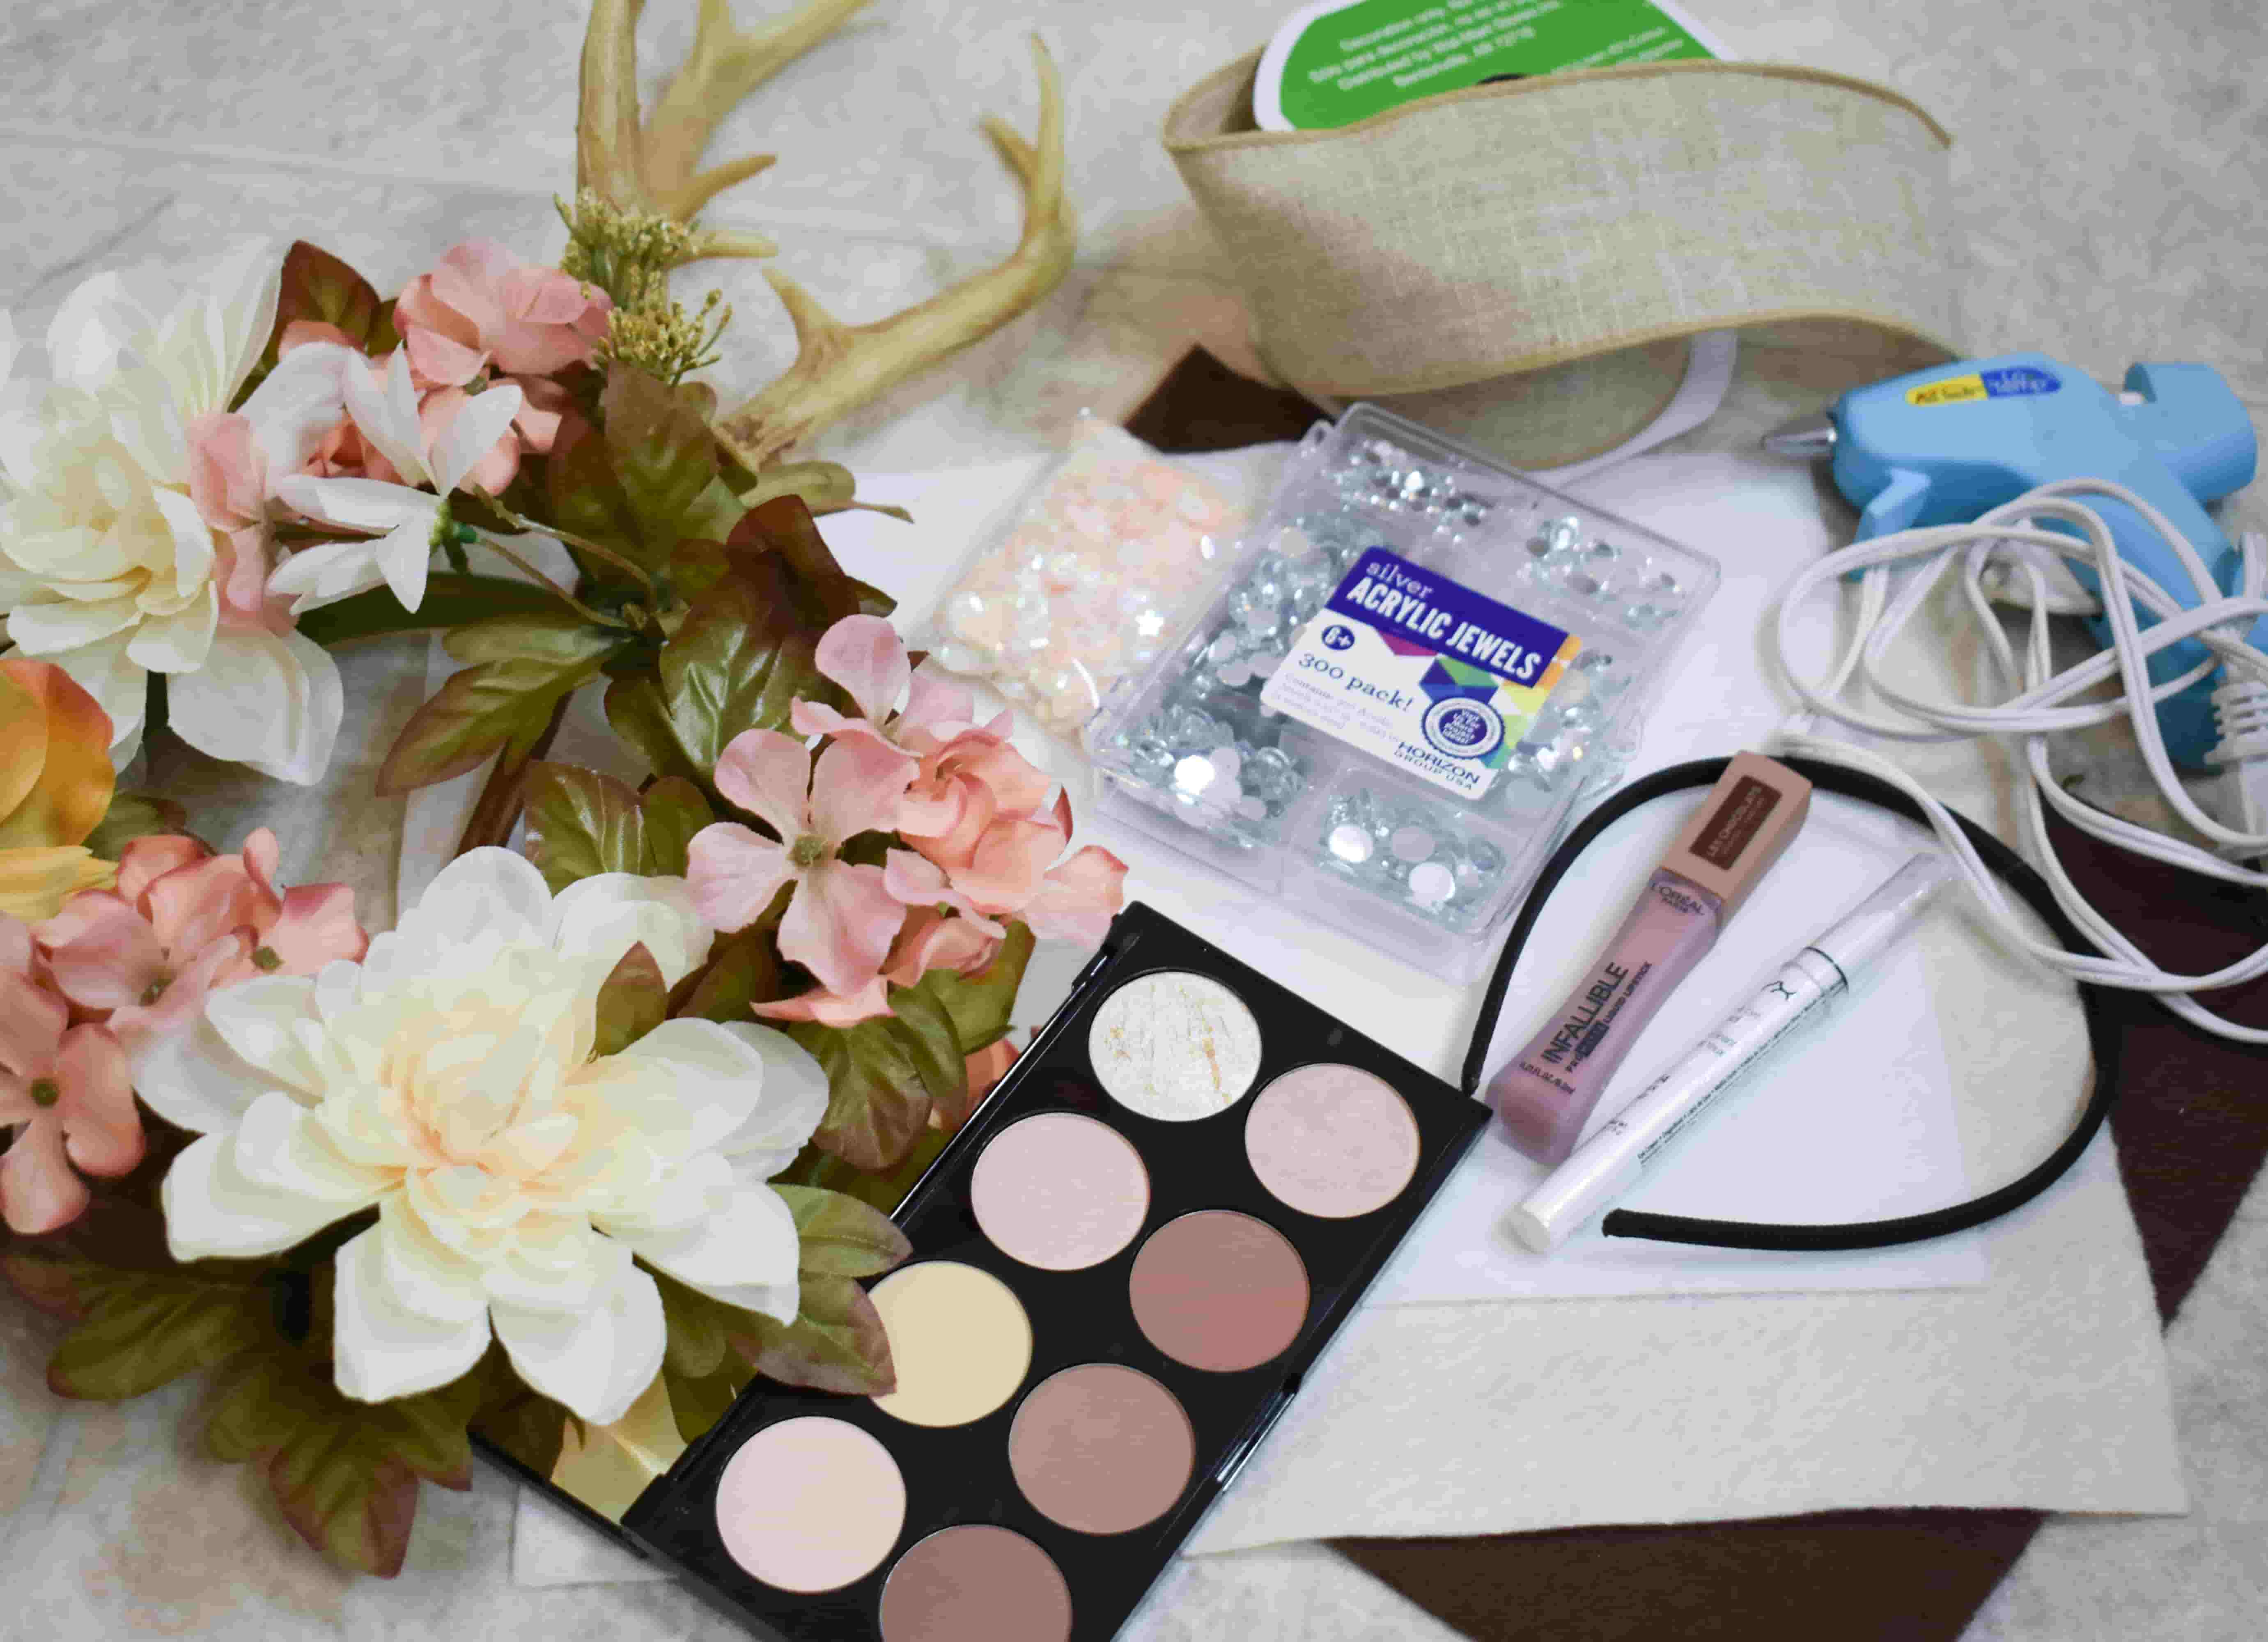
Supplies
- Plain headband (hard and thick is better)
- 3 sheets of felt (various shades of brown & beige)
- Fake flowers/leaves
- Glue gun
- Floral twine
- Plastic antlers
- White eye pen
- Black pot gel eyeliner
- Black felt tip eyeliner
- Dark bronzer
- Small blending eyeshadow brush
- Large fluffy brush
- Small lip brush
- Sequins/jewels (optional)
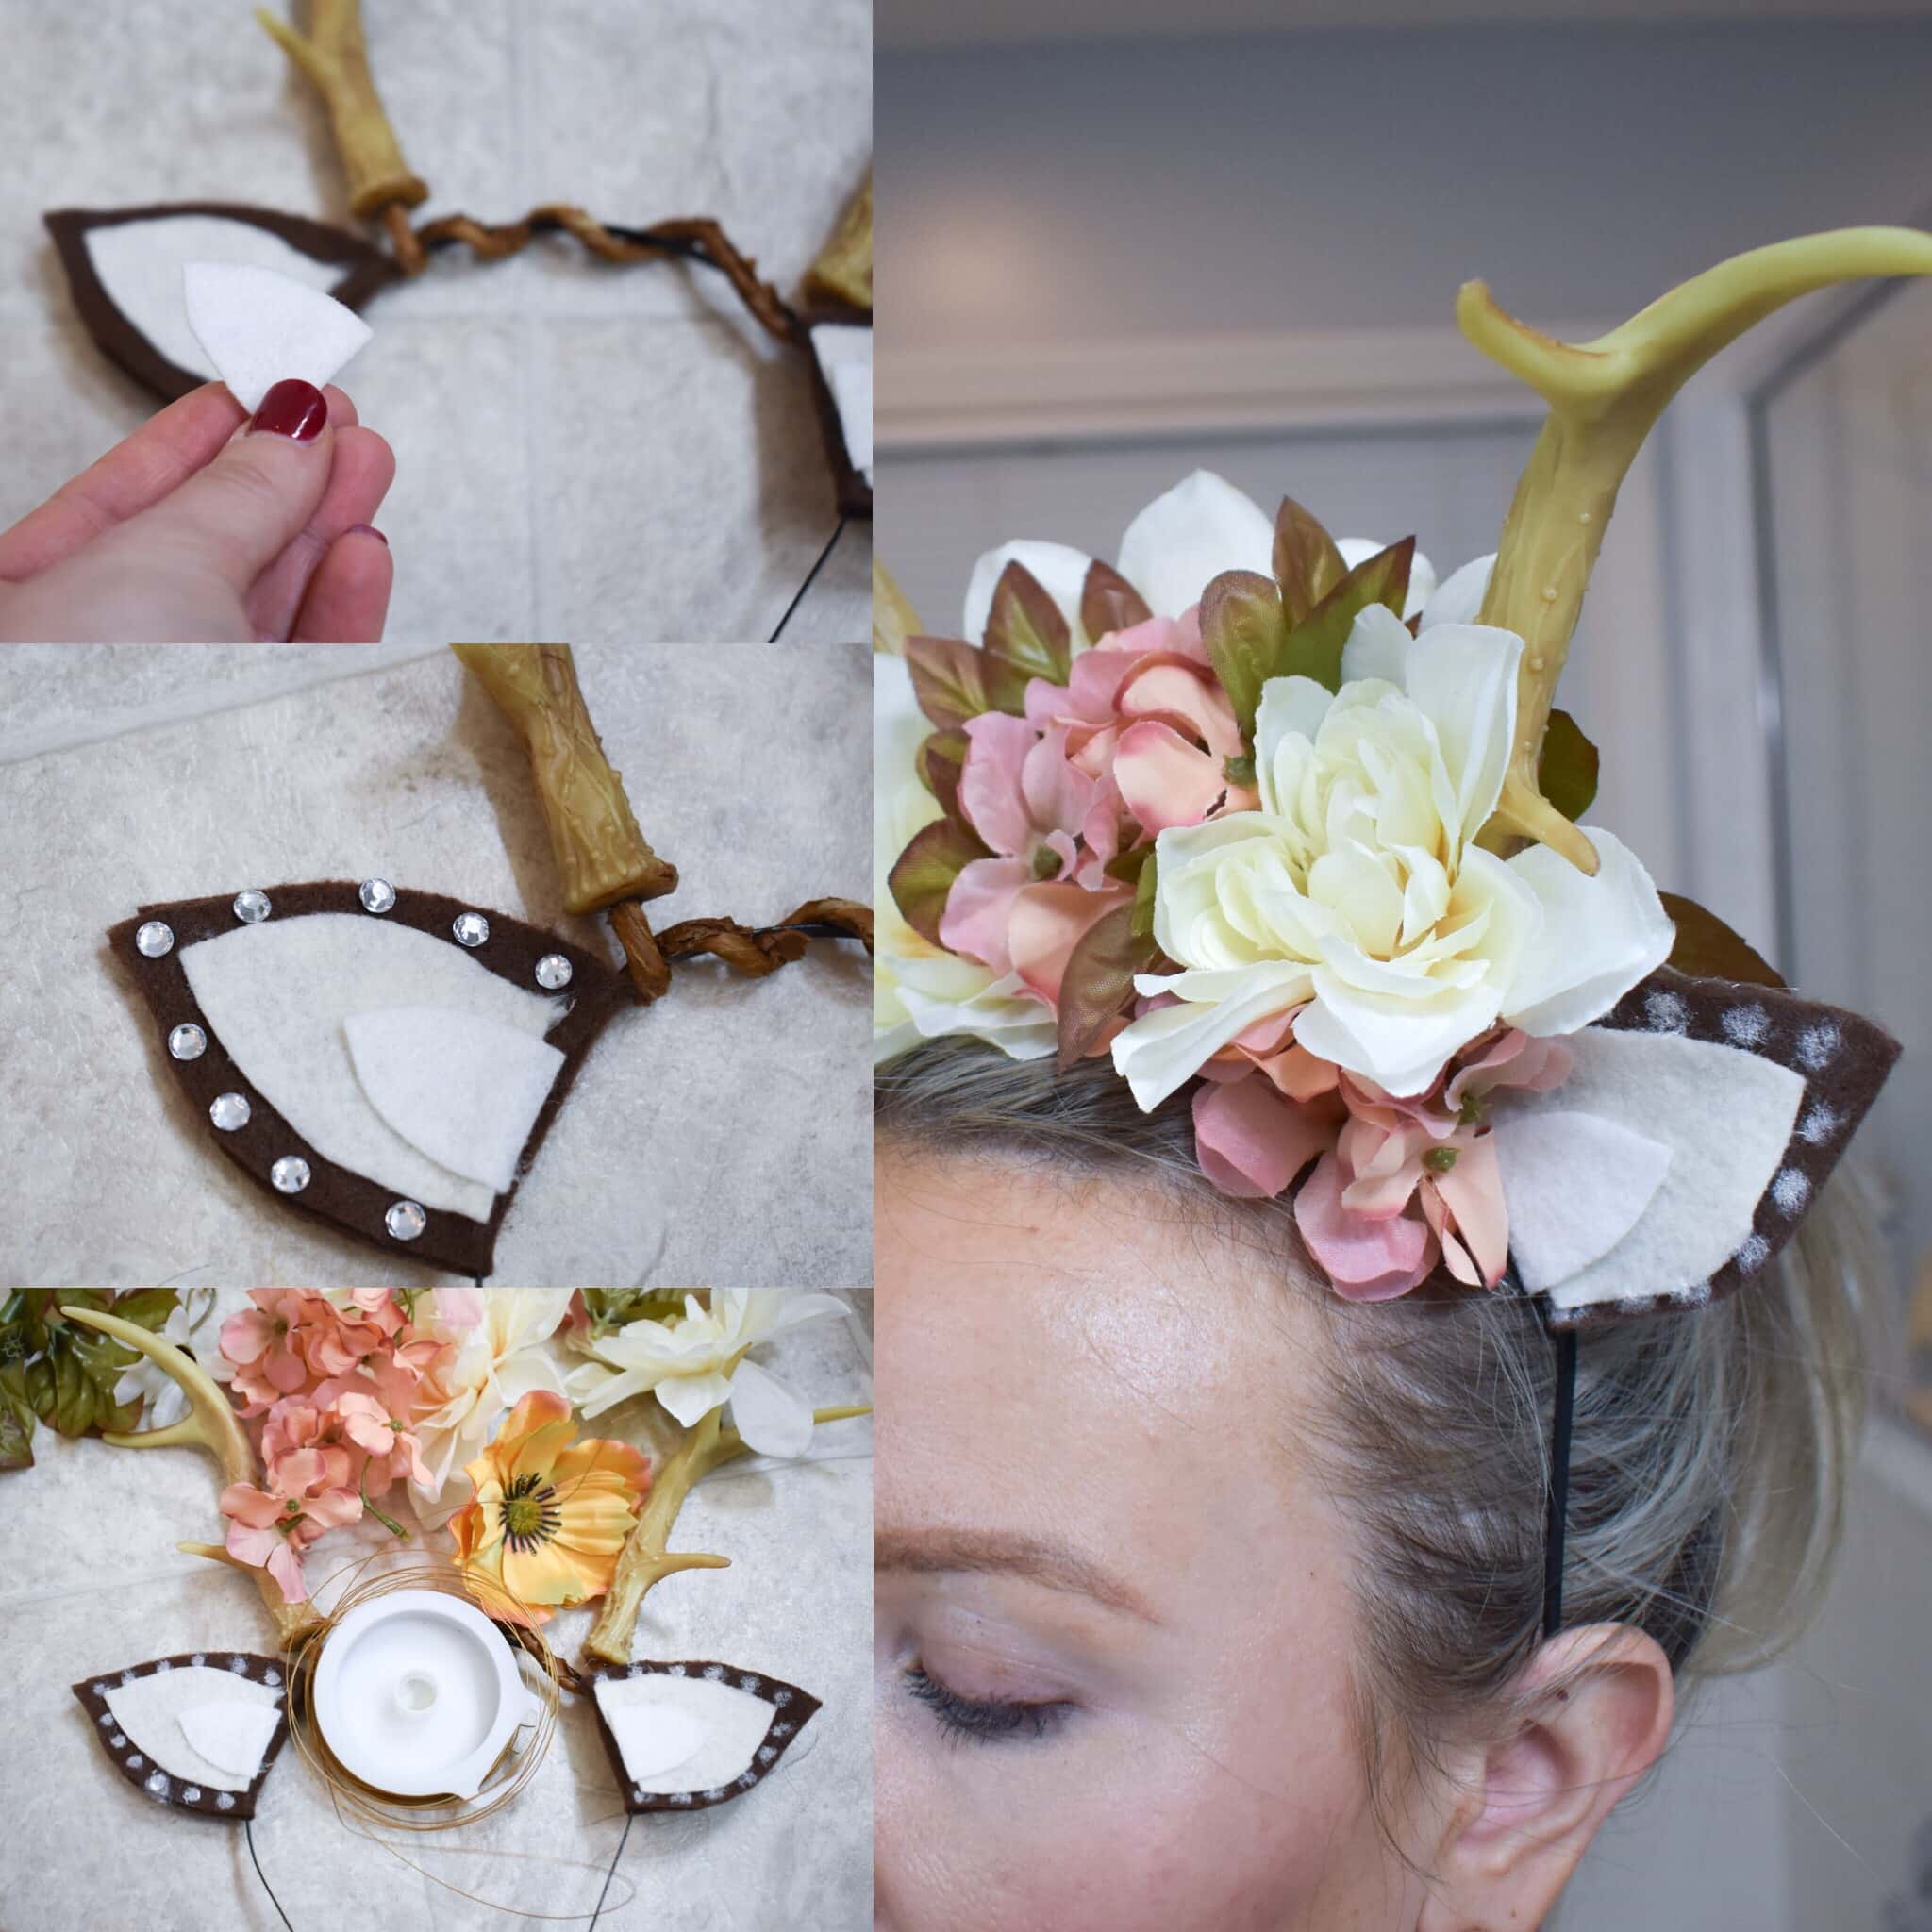
Antler/Ears Headband Directions
1. Remove the antlers from the base and twist around the headband. If your antlers don't have a stiff base use floral twine or tape to attach to the headband.
2. Prepare the ears by cutting out the largest pieces in dark brown. Make sure the dark brown piece can be folded around the headband and glued. The two lighter colors of fabric will be glued to the front side of each ear.
3. Use the white pen, sequins or jewels to add dots around the edge of the dark brown ear shape.
4. Glue the ear pieces around the headband adding extra glue to secure to the band itself
5. Arrange the leaves and flowers where you would like them on the headband and glue or secure with the floral wire.
Please note: This post may contain affiliate links. If you purchase from one of these links, you will help support IHadCancer and the free content we share. The cost of the product is not affected. You can learn more about our terms here.


Anna is a young breast cancer survivor and is celebrating 1.5 years cancer free. She lives in Apex, North Carolina with her hubby and mini goldendoodle. Anna is the founder/author of MyCancerChic.com and runs the local support group for young breast cancer survivors in the Raleigh area.