A Young Adult Survivor's Guide to Growing & Styling Post-Chemo Hair
A version of this post originally appeared on Anna's blog, MyCancerChic
The number one thought on most people’s minds during and after chemo is how quickly hair will grow back and what it will look like. Though I became quite fond of my bald head, the day chemo was over, I threw that love to the wind and put all my energy into regrowing my hair. About a year and a half later, I have some valuable insight to share with you. I will let you know what helped grow my hair, when you can dye your hair and how to style it at all those awkward stages along the way.
The first step post-chemo is to start taking some kind of hair growth supplements. Look for something with a high level of Biotin (2,000 mcg is ideal). If you find the straight Biotin tablets break, you out, experiment with a fast dissolving tablet or the Olly Undeniale Beauty gummies, which I LOVE. I started taking Biotin on my last day of chemo (with my doctor's approval), and I was so amazed by the results. My hair grew like weeds. Don't be surprised, though, if you quickly have hair sprouting up everywhere on your body (including your face). You may need to experiment with the dose of Biotin to find the perfect amount for your body.
The next step is to look for inspiration. With trends ever-changing, short hair is currently in, and the internet is filled with pixies, bobs, and buzz cuts. Look to other cancer survivors as well. Finding someone at a similar stage of hair regrowth with a similar texture can be extremely helpful. You can also get great ideas on Instagram by searching hashtags like #chemohair #chemocurls #hairgrowth and other similar phrases.
So, now that you have some inspiration and your hair is starting to grow, how do you style it? Experimentation and having the right products are key to success. As the months go on, the natural color, texture, and condition of your hair may change. You will have to change your products to adapt.
Now, let's jump into styling! I have broken the styling guide down into 6 stages that correspond with the estimated hair length at each stage. I also included recommendations on coloring in the appropriate time frame.
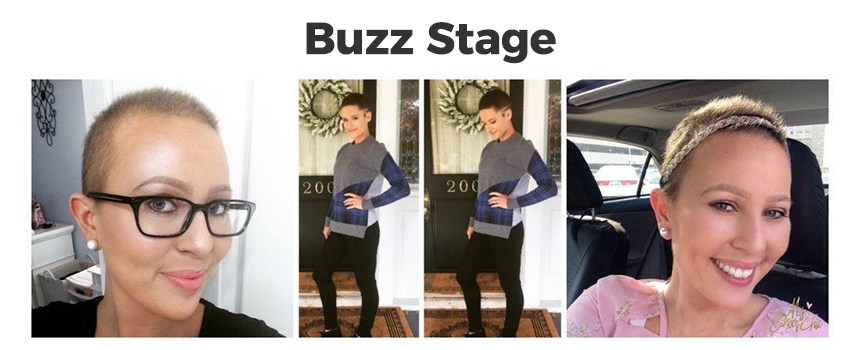
There is not much you can do at this point in terms of styling or products, but since the sides of your hair will grow faster than the top, you may want to head to your salon to shape up the fringe around your hair if it gets too long for your liking. At this stage, you will really want to go for strong brows and eye makeup as well to balance your face and create definition. If you're feeling more adventurous, you can also experiment with an undercut or a buzz design like the one pictured on the beautiful @kris10_leann.
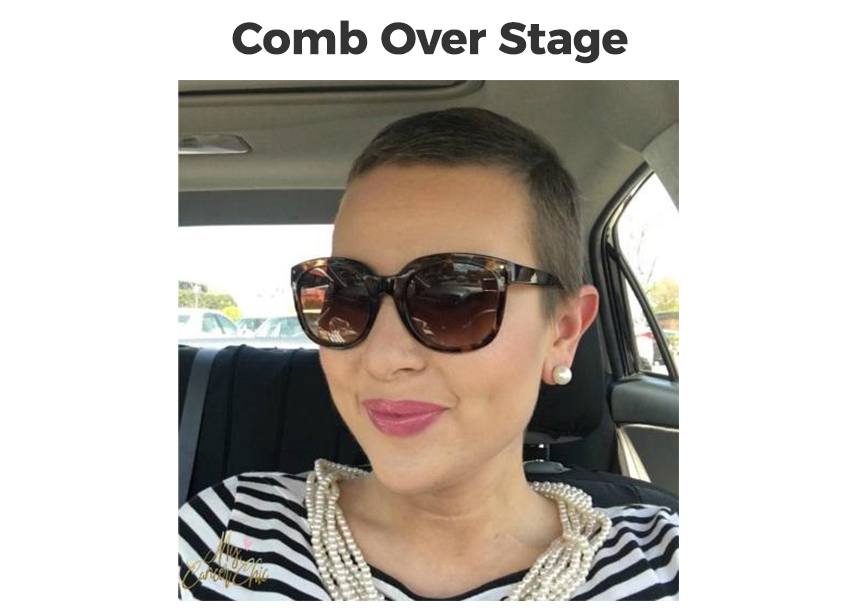
As you transition out of the buzz cut stage, you will have just enough hair to create a comb-over look. Using a comb and styling pomade, you can smooth your hair into your first official style.
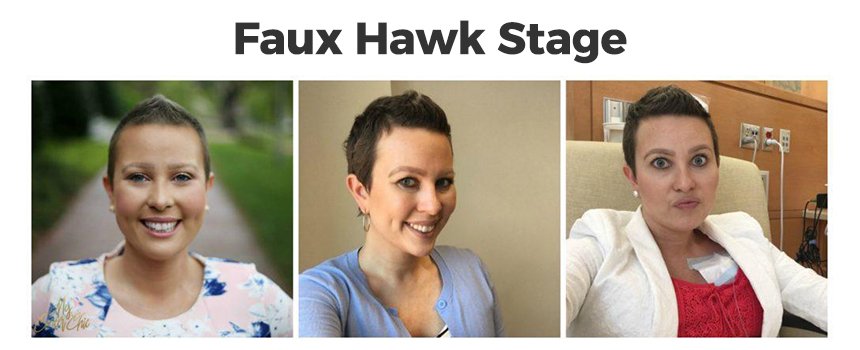
As your hair gets a little bit longer, the faux hawk is another great style to try. You will have just enough hair to smooth to the middle, and this will disguise the lack of length on the front of your head.
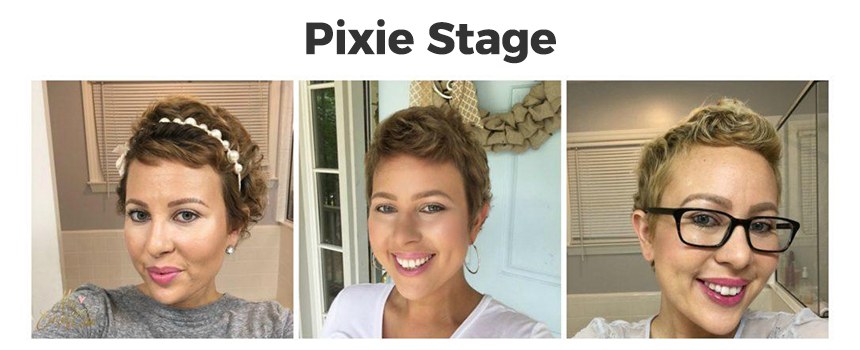
By about 6-8 months you will have more of a pixie look, which gives you more styling options. Investing in mini straightener and some touchable curl cream will allow you to easily options to wear your hair curly or straight. Hair oil is also great for smoothing the frizz that comes with chemo curls. You may also find that you need hydrating products at this stage to combat the dryness that comes with curly hair. The hydrating shampoo and conditioner from Pureology were lifesaving products for me.
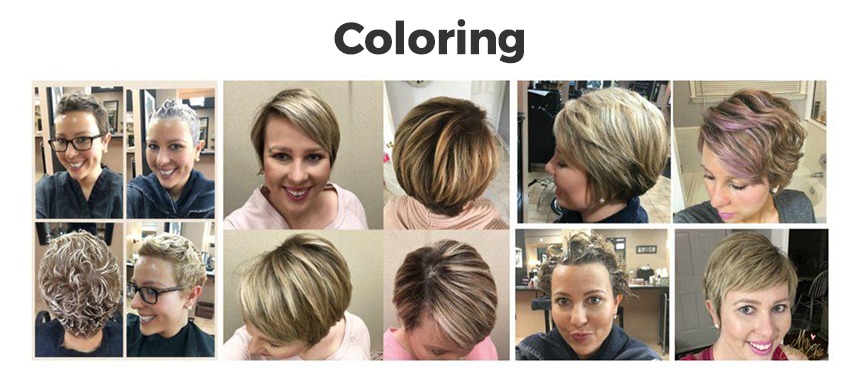
If you are interested in coloring your hair 5-6 months is usually the earliest you should start. If you are going lighter, talk with your hairstylist about using an ammonia-free color/bleach that will be less damaging to your new hair. I dyed my hair at the 5-month mark and gradually went blonder over time in order to protect my hair.
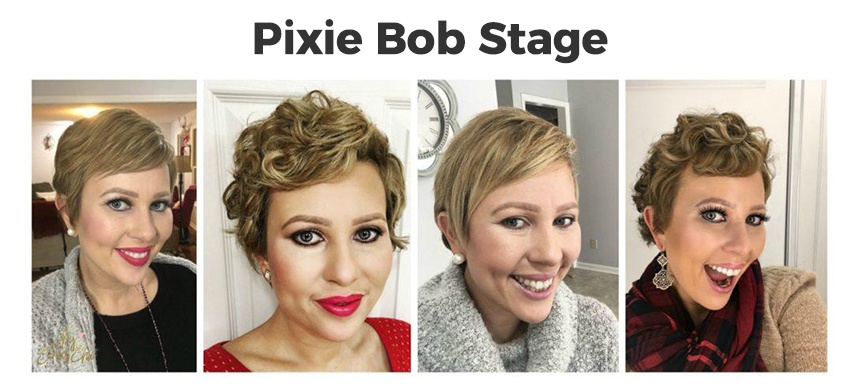
As the top of your hair finally begins to catch up in length, you will have more styling options. While you will want to continue to have your hair stylist trim the nape of your neck and ears, start to feather the ear area instead of a blunt cut to create that super cute fringe look. Experiment with the mini straightener to create curls or try sleeping in foam rollers for a more retro look. Check out the video below for a full tutorial.
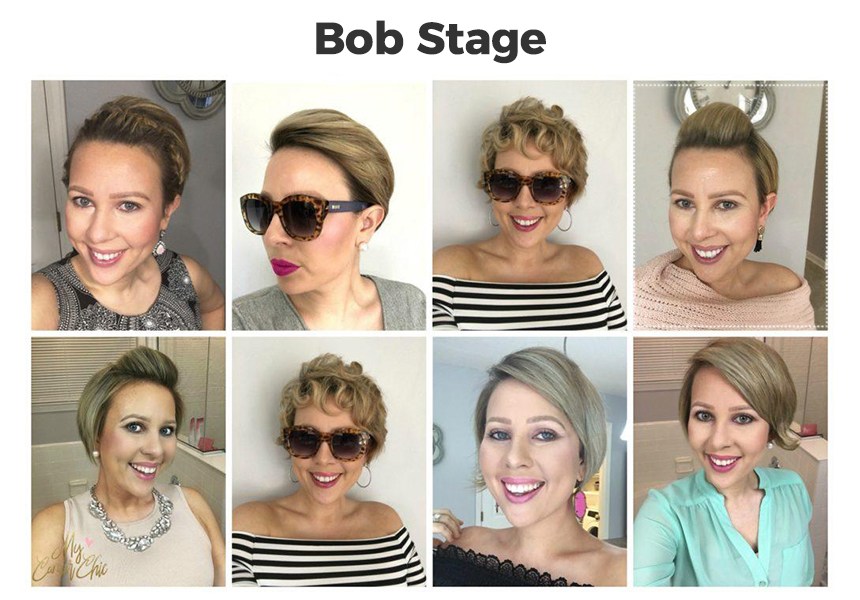
Once you get to the bob stage (usually around 1 year), you can finally straighten your hair fully (with a 1/2" straightener), curl it, pull it back with bobby pins or create a more tousled look with a little texture spray. Have fun with it. I continued to cut the back of my hair throughout this stage to allow the front to catch up. Remember to be open to new products and continue to experiment.
With the right tools, products and accessories, you can successfully achieve a stylish look at every stage of hair growth.

To recap, these are some must-have tools: Mini straightener, 1/2" straightener, foam rollers, rat tail comb, styling brush, and teasing brush. 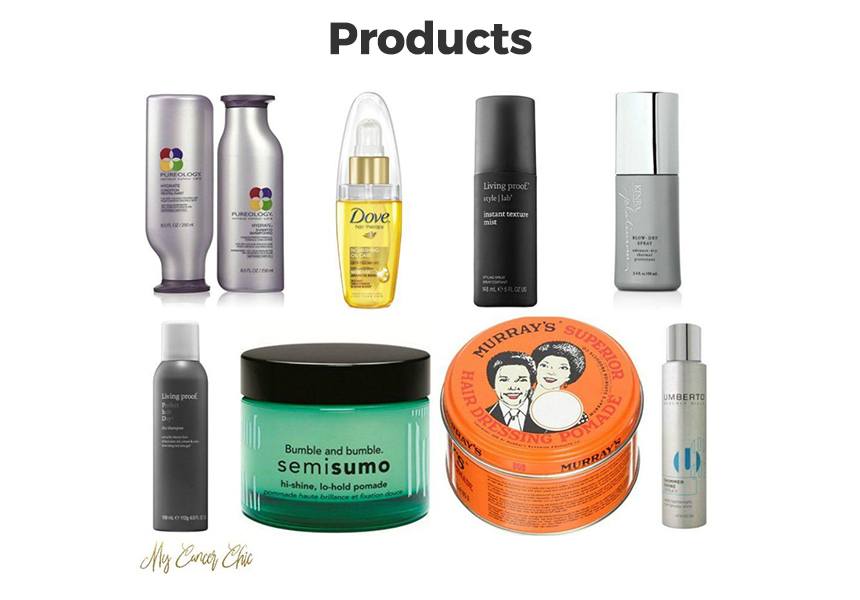
Some of my favorite products include: Hydrating shampoo & conditioner. Hair oil, Texture spray, Heat/Blow Dry Spray, Dry Shampoo, Styling Pomade (light and strong), and Shine Spray. 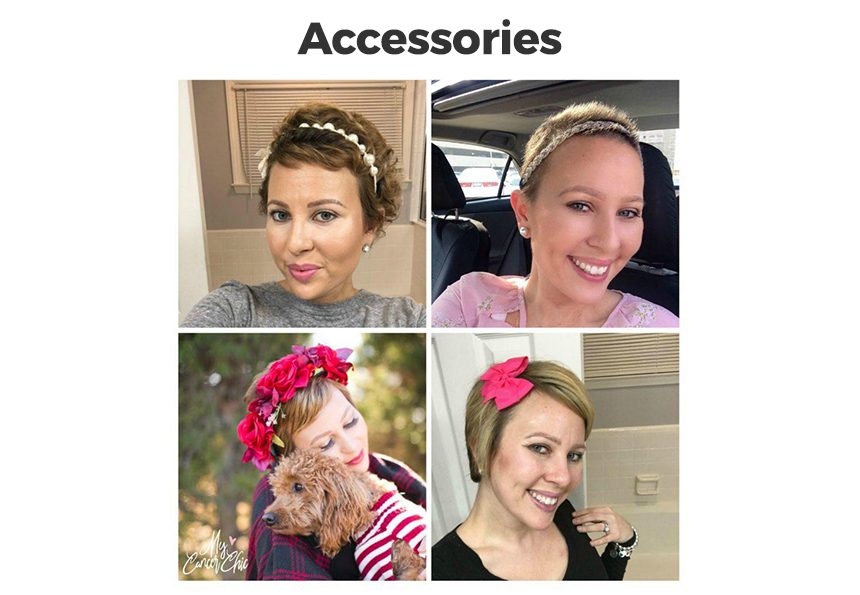
And here are some of my top accessory recommendations: Pearl Headband (similar), Jeweled headband (similar), Flower Crown (exact), Barrettes/clips (similar).
What was your hair re-growth journey like? Share your experiences and tips in the comments below!


Anna is a young breast cancer survivor and is celebrating 1.5 years cancer free. She lives in Apex, North Carolina with her hubby and mini goldendoodle. Anna is the founder/author of MyCancerChic.com and runs the local support group for young breast cancer survivors in the Raleigh area.